Gandikota canyon rappelling: essential safety gear and anchors
Gandikota canyon rappelling is not a tourist photo stop with a rope attached for decoration. You are committing your body to a vertical system above the Pennar Gorge.
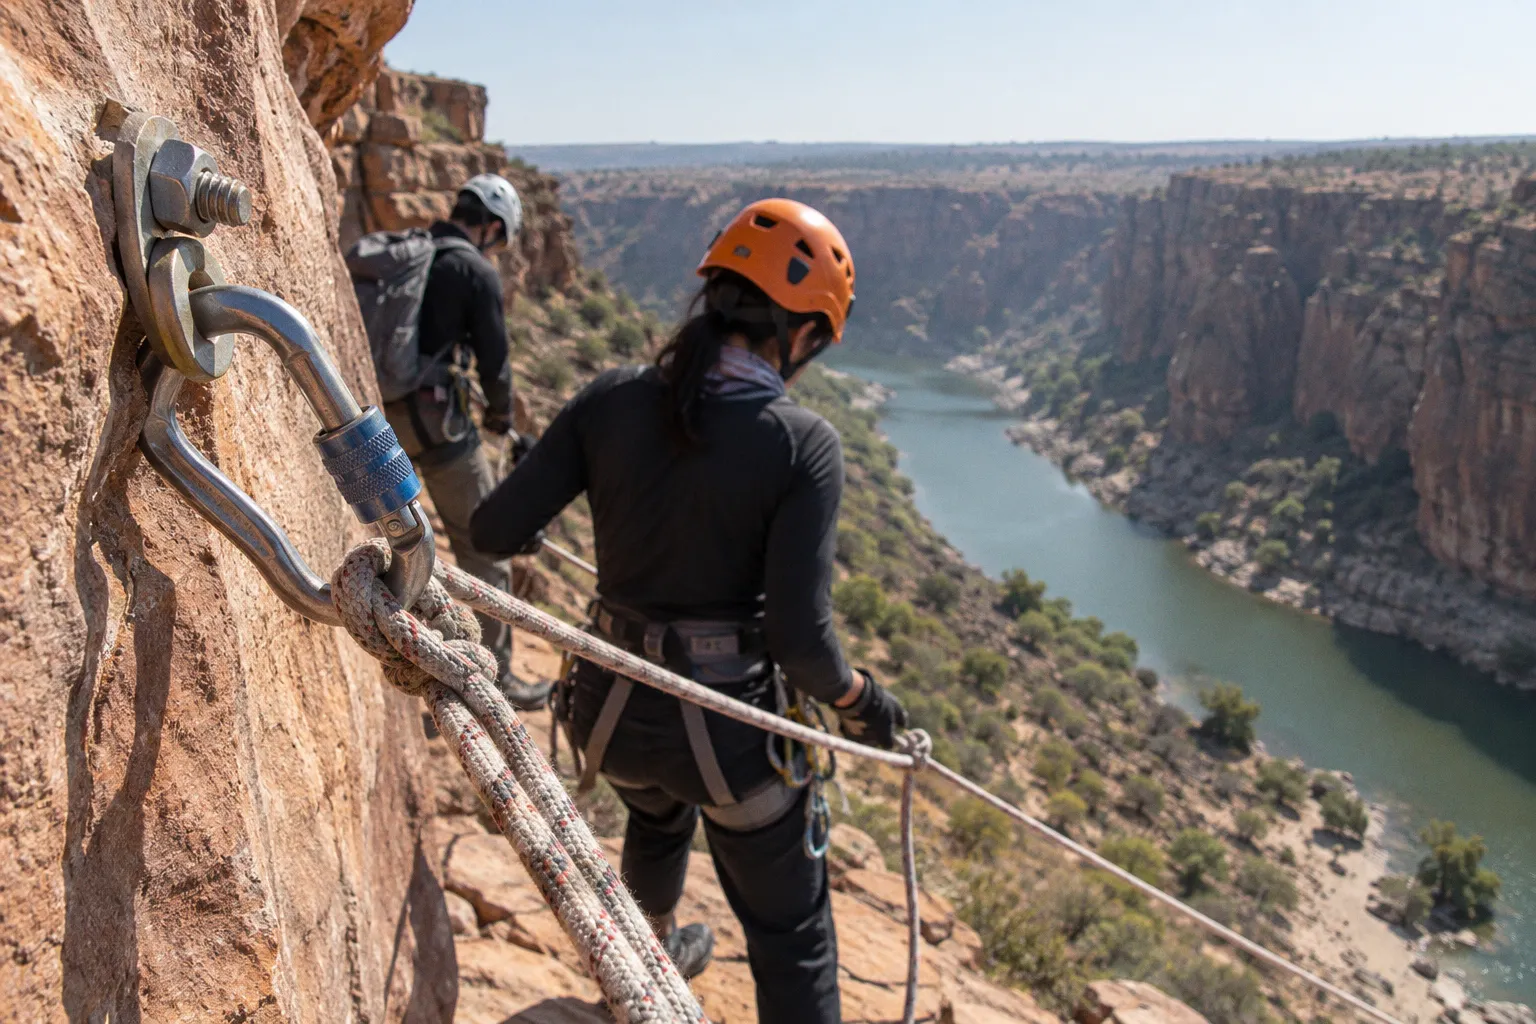
That system must control your descent, protect you from rockfall and impact, and keep working when sandstone dust, sharp edges, heat, or wet gear start attacking every connection.
The right gandikota canyon rappelling safety gear requirements begin with one rule: do not separate equipment from technique. A certified helmet does not correct a bad anchor. A new rope does not compensate for a loose harness fit. A guide may supply the PPE, but you still need to understand what is holding you, where the rope runs, and which movements can load the system dangerously.
Start with the PPE that stays on your body
A commercial Gandikota rappelling package should provide the core protective equipment: helmet, harness, ropes, and supervision from a certified instructor. Treat that as the minimum operating platform, not as proof that every descent is automatically safe.
Before you move toward the edge, perform a full body-and-system check. Do it standing well back from the drop. Keep your weight off the anchor while you inspect the equipment.
Helmet: protect the part you cannot replace
Wear a climbing or canyoning helmet that fits tightly enough to stay stable when you look up, down, or sideways. The chin strap must remain secured throughout the descent. A loose helmet can shift during a slip, catch on rock, or expose the side of your head when you need protection most.
The helmet has two jobs:
- Shield your skull from falling fragments released by a climber, rope movement, or loose canyon rock.
- Reduce injury during contact with the wall, especially when you swing or rotate under the rope.
Do not clip gear, water bottles, or loose straps across the helmet. Keep the shell free to do its job. Inspect it for cracks, deep abrasions, deformation, or damaged adjustment components. If the helmet has taken a significant impact, retire it even when the damage looks cosmetic.
Harness: fit first, attachment second
A harness must sit above the hips, with the waist belt snug enough that it cannot slide over the pelvic bones. Leg loops should hold the legs without cutting circulation. You should be able to move, step, and raise your knees without the harness shifting.
Run your fingers around the waist belt after tightening. If you can pull a large fold of webbing away from the body, tighten it. Thread every buckle according to the harness design. A buckle that looks closed but is not correctly doubled back can fail as a fitting system, even if the material itself remains intact.
Your belay or rappel attachment point must sit in the intended central position. Do not clip a descender into an improvised loop, gear loop, or random webbing section. Gear loops carry equipment. They do not carry a human body.
A helmet protects your head. The anchor holds the system. Your technique keeps the load predictable. You need all three.
Clothing and footwear: control your contact points
Wear footwear with a firm sole and reliable grip. Loose sandals are a poor choice for a vertical route. You need to place your feet against the wall, push away from abrasive surfaces, and recover balance without losing contact.
Choose clothing that will not snag on the descender, rope, or anchor hardware. Avoid wide scarves, dangling straps, and unsecured bags. Protect your hands from rope friction and rough rock, but do not wear bulky gloves that reduce your ability to control the device.
If the route includes sustained water contact or wet canyoning, thermal protection changes from comfort item to safety equipment. The research base for technical canyoneering lists a 5 mm neoprene wetsuit for wet environments. Do not wear that thickness automatically on a hot, dry Gandikota descent. Match insulation to actual water exposure, air temperature, duration, and the operator’s route plan. Overheating can degrade decision-making just as quickly as cold stress.
Build the technical system around controlled friction
Rappelling works because the rope passes through a device that creates friction. That friction must be high enough to control the descent and predictable enough to stop or slow the system when you need it.
A practical gandikota cliff descent gear list normally includes:
1. Static or low-stretch rope for the descent. Canyoneering systems commonly use ropes selected for controlled vertical work and abrasion resistance. Confirm the rope type and diameter match the descender.
2. Locking carabiners. Use appropriately rated connectors with a locking mechanism. Check that the gate closes completely and that the carabiner does not sit cross-loaded against rock or hardware.
3. A descender. Figure-eight devices and canyoning-specific friction devices appear in technical gear lists. The correct device depends on rope diameter, rope condition, descent angle, user weight, and the operator’s procedure.
4. A backup system. A prusik loop or another approved friction hitch can provide a hands-free backup when used correctly. It is not a magic knot. It must be compatible with the rope and positioned so it can engage without creating a new hazard.
5. Helmet and harness. These remain part of the technical system, not separate costume pieces.
6. Anchor webbing and replacement material. One-inch tubular webbing is commonly used for building or replacing anchors where the system and local practice call for it.
7. Edge protection. Rope must not run directly over a sharp lip when a pad, redirect, rope protector, or altered anchor position can reduce cutting and abrasion.
8. Communication equipment or signals. The team needs a clear way to communicate between the top, descent line, and landing zone.
The exact configuration matters more than the number of items in a kit. Carrying two locking carabiners does not make a system redundant if both sit on the same damaged sling. Packing a prusik does not create a backup if nobody on the team knows how to deploy it under load.
Static rope is not a universal answer
Do not treat rope labels as a substitute for a system check. A rope may be suitable for a particular descent and still be damaged, contaminated, incompatible with the device, or too short for the pitch.
Inspect the rope before rigging:
- Look for cuts, glazing, flat sections, severe fuzzing, chemical contamination, or inconsistent diameter.
- Run the rope through your hands and feel for hard spots or soft sections.
- Check the ends and markings.
- Confirm the rope length against the descent plan, including the anchor, landing zone, and a safe margin.
- Tie and secure the end so nobody can rappel off it.
The rope should run cleanly through the descender. It should not twist the connector sideways, rub against an unprotected edge, or pass through hardware that does not match its diameter. If the system feels jerky, overheats rapidly, or produces uncontrolled acceleration, stop. Do not solve a friction problem by gripping harder and hoping the canyon becomes more forgiving.
Lock the connector and control the device
A locking carabiner must connect the descender to the harness attachment point in the orientation intended by the equipment manufacturer or guide’s system. Close the gate. Lock the sleeve. Test the connection before you approach the edge.
During the descent, keep your braking hand below the descender in the position demonstrated by the instructor. Feed rope gradually. Do not wrap the brake strand around your hand. Do not switch hands while moving over an exposed section. Keep your body position stable before adjusting equipment.
Use your feet to manage distance from the wall. Push away gently, lower your body, and keep the rope aligned through the device. Avoid bouncing. Every bounce increases shock loading, disturbs loose rock, and can drive the rope across an edge.
Anchors decide whether the descent starts
The anchor is the point where the whole system transfers load into the canyon. You cannot inspect it casually and call the job done. You need to identify what holds the anchor, how the load reaches that point, what direction the load will travel, and what happens if one component fails.
The available research confirms that technical canyoning relies on specific equipment configurations and certified anchors. It does not establish a universal bolt specification or a permanent hardware standard for Gandikota’s walls. Do not invent one. Do not assume every visible bolt, ring, tree, boulder, or webbing loop is suitable for your descent.
Evaluate the anchor before clipping in
A competent rigging inspection considers:
- Rock quality: Look for loose blocks, fractured ledges, hollow-sounding sections, and rock flakes that could shift under load.
- Anchor direction: A point that appears strong from above may be poorly aligned with the actual pull of the rappel.
- Hardware condition: Inspect visible metal for corrosion, deformation, sharp edges, movement, or damage. Do not rely on appearance alone.
- Webbing condition: Reject webbing that shows cuts, severe abrasion, fading associated with exposure, melted sections, stiffness, or questionable history.
- Edge contact: Identify every place where rope or sling touches rock. A sound anchor becomes a dangerous system if the rope can saw across a sharp lip.
- Redundancy: Determine whether the system has an appropriate backup and whether both components share the same weakness.
- Equalization: Check that the load reaches the anchor components in a controlled direction rather than pulling one point violently while the other remains decorative.
- Landing zone: Confirm that the rope reaches a stable area and that the person descending will not swing into a wall, ledge, loose block, or water hazard.
A handhold is not an anchor. A convenient tree is not automatically an anchor. A single piece of hardware is not automatically redundant. If you cannot explain what the system does when its primary component fails, you are not ready to load it.
A canyon anchor is not judged by how solid it looks from the trail. It is judged by how the entire system behaves under the direction of load.
Webbing needs a field inspection, not optimism
One-inch tubular webbing is widely used in technical anchor construction and replacement. It offers flexibility and can distribute load around suitable natural features, but it remains vulnerable to abrasion, sharp rock, heat, contamination, and age.
Keep webbing away from edges. Pad contact points. Inspect every section that bears against stone. If the sling passes around a boulder, confirm that the boulder itself cannot roll, pivot, or lever out of position. If the webbing disappears behind rock, you do not have a complete inspection.
Do not tie a new sling over an old, damaged sling just because the existing material is convenient. Remove questionable material when the system owner or qualified rigging lead permits it, and replace it with compatible, correctly tied material. A fresh-looking tail does not prove that the hidden load-bearing section remains sound.
For a commercial descent, ask the guide to explain the anchor arrangement in plain terms before you clip in. You do not need a lecture on structural mechanics. You do need to know whether the system uses fixed hardware, natural anchors, webbing, a backup, or a combination—and who inspected it.
Operator protocols matter as much as the kit
Commercial providers at Gandikota offer packages combining rappelling with camping, trekking, rock climbing, and kayaking along the Pennar River. That variety creates a practical problem: equipment and procedures must change between activities.
A harness configured for a rappel is not automatically ready for a kayak. A rope used around dry rock should not be assumed suitable for constant wet abrasion. A helmet selected for vertical work may require different fit or drainage considerations in water. The operator must separate systems, inspect them between uses, and brief participants on the hazards of each activity.
Before starting a guided descent, watch for a structured process rather than a rushed gear handout. A serious briefing should cover:
- How the harness closes and how the attachment point works.
- Where to place the braking hand.
- How to communicate with the guide above and the person below.
- What command means stop, lower, tension, or emergency.
- Where to stand near the edge.
- How to move when the rope becomes loaded.
- What to do if you become stuck, spin, or lose contact with the wall.
- Whether the route includes loose rock, water, exposed traverses, or a difficult landing.
The instructor should check each participant’s harness, helmet, connector, and descender before loading the system. The guide should control the edge area and keep unprotected people away from the anchor. Nobody should step over a loaded rope without instruction.
Certification is useful, but observe the work
The research identifies certified instructors as part of commercial Gandikota rappelling packages and points to UIAA or European safety standards for PPE used in technical climbing and canyoneering. That gives you a baseline for equipment selection. It does not let you switch off your judgment.
Look at how the team operates:
- Do they inspect ropes and hardware before the group approaches the edge?
- Do they keep the anchor area organized?
- Do they use helmets throughout the vertical section?
- Do they explain the descent instead of simply clipping guests in?
- Do they manage spacing between rappellers?
- Do they have a plan for a stuck or injured participant?
- Do they stop activity when weather, visibility, rockfall, or water conditions change?
Avoid providers who treat safety gear as a costume, allow uncontrolled crowding at the edge, or refuse to explain the system. A guide who cannot answer basic questions about the descent setup should not ask you to trust the setup with your full body weight.
Combining rappelling with Pennar Gorge activities
A multi-sport Gandikota itinerary can combine canyon trekking, rock climbing, camping, rappelling, and kayaking. That makes logistics important. Carry less clutter near the cliff, but do not leave essential safety equipment behind because the next activity looks easier.
Trekking into the canyon
Approach with the rappel system in mind. Loose packs swing into rock and snag on hardware. Secure water, camera equipment, and straps. Keep a hand free when moving on exposed ground. Do not let the group spread so far that the front team enters the landing zone while the rear team still stands beneath loose terrain.
Inspect the approach, not only the drop. Many incidents begin before the rope is loaded: a slip on dusty rock, a twisted ankle under a heavy pack, or a participant walking beneath an active scramble line.
Rock climbing and bouldering
Climbing equipment overlaps with rappelling equipment, but the operating loads and protection systems may differ. Do not assume that a piece of rock climbing equipment is appropriate for a canyon anchor simply because it has a carabiner attached.
For technical climbing near the gorge, use equipment that meets recognized safety standards and matches the activity. Keep loose protection, chalk bags, and personal items from interfering with the rappel system. If you move from climbing to descending, reset the system and perform a new check. Never rely on memory after changing devices, ropes, or attachment points.
Kayaking and river exposure
Pennar River conditions can alter the risk profile. Wet ropes become heavier and may behave differently through a friction device. Water, silt, and grit can contaminate hardware. Cold exposure becomes relevant in prolonged immersion, while heat stress dominates dry canyon approaches.
Separate wet and dry equipment when possible. Rinse and inspect gear after exposure to sediment or water. Do not drag ropes through abrasive river margins and then send them over a sharp canyon edge without checking them again.
For a wet canyoneering section, thermal protection such as a 5 mm neoprene wetsuit may be appropriate according to conditions. In a dry descent, that same suit can create overheating and fatigue. Use the equipment the route demands, not the equipment that looks most technical.
A practical gear table for planning the descent
| System element | What it must do | What you inspect before loading |
|---|---|---|
| Helmet | Protect the head from rockfall and wall impact | Cracks, deformation, strap function, stable fit |
| Harness | Transfer body load through the intended attachment point | Correct buckle closure, snug waist belt, intact webbing |
| Static or suitable low-stretch rope | Provide a controlled descent line | Cuts, glazing, flat spots, contamination, length, end security |
| Descender | Create predictable friction | Rope compatibility, correct threading, connector orientation |
| Locking carabiner | Connect the descender or system components | Gate closure, locking action, deformation, cross-loading |
| Prusik or approved backup | Provide additional friction control when correctly deployed | Cord condition, compatibility, placement, access under load |
| Anchor webbing | Connect or equalize suitable anchor points | Abrasion, cuts, heat damage, edge contact, hidden sections |
| Fixed or natural anchor | Transfer load into competent rock or a suitable feature | Rock quality, direction of pull, hardware condition, redundancy |
| Edge protection | Prevent rope and webbing damage | Full contact area, stability, movement under load |
| Communication system | Coordinate movement between team members | Clear commands, line of sight, backup signals |
This table does not replace a qualified rigging inspection. It gives you the order of operations: body protection, rope control, connection, anchor, edge, communication. Skip one and the system develops a weak point.
When to call a hard stop
You do not need to prove toughness by continuing with a compromised setup. Stop the descent and move to a safe position when:
1. The rope does not reach the intended landing zone with a secure end.
2. The anchor contains unknown or visibly damaged hardware.
3. Webbing runs across a sharp edge without reliable protection.
4. The guide cannot explain the attachment system or emergency procedure.
5. Your harness, helmet, or locking connector does not fit or close correctly.
6. You cannot maintain the braking position demonstrated by the instructor.
7. Rockfall, heavy rain, lightning, rising water, or poor visibility changes the route.
8. You feel dizzy, overheated, panicked, or unable to control your body position.
9. The landing zone is occupied, unstable, or exposed to falling equipment.
10. The system requires improvisation with gear that was not designed for the load.
A no-go decision is not a failure of nerve. It is correct field judgment. The canyon will still be there when the equipment, weather, and team are ready.
Final go/no-go check
Go only when the operator has inspected the route and anchor, the PPE meets recognized climbing or canyoning standards, every connection is locked and understood, the rope is compatible and protected from edges, communication is clear, and the landing zone is controlled.
Go only when you can descend under command without frantic movement. Keep the braking hand low. Face the wall. Place your feet deliberately. Control the rope. Stop when told.
Call it off when the anchor is questionable, the hardware is damaged, the rope is compromised, the conditions are shifting, or the team is rushing. Gandikota canyon rappelling rewards precision, not bravado. Your gear must be certified or appropriately rated, your anchors must be properly assessed, and your body must remain under control from the first step to the final unclip.