Gandikota canyon trekking: essential gear and safety checklist
Gandikota rewards preparation and exposes shortcuts. The Pennar Gorge cuts through the Erramalai ranges in steep bands of red quartzite, and the same terrain that looks dramatic from the viewpoint…
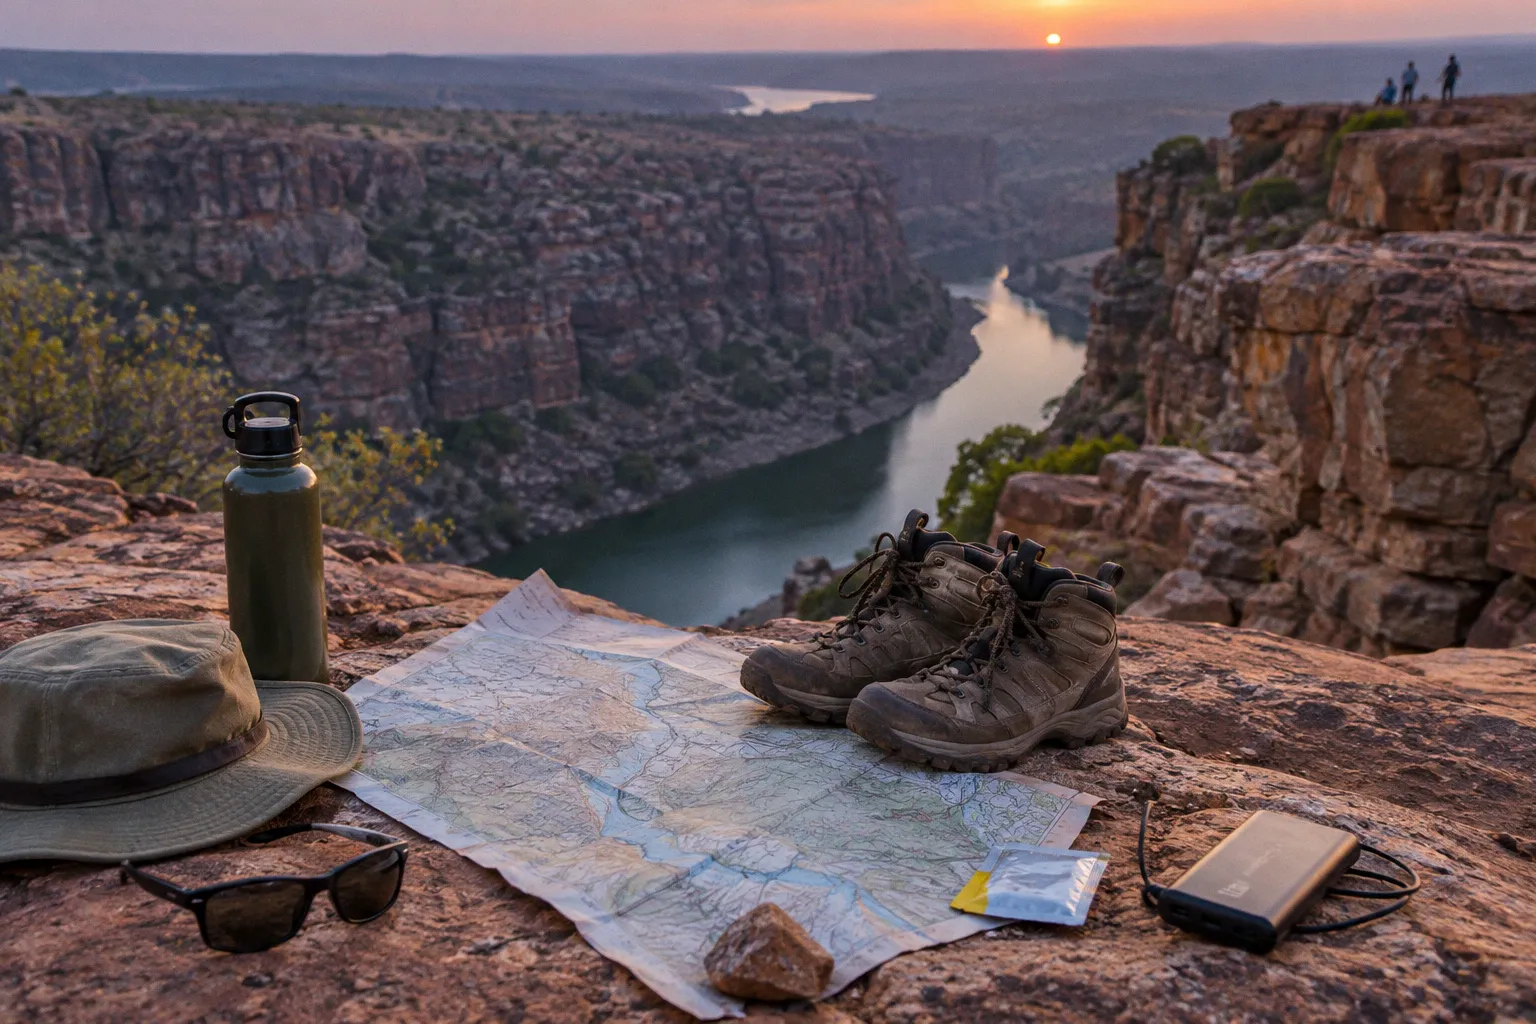
Gandikota rewards preparation and exposes shortcuts. The Pennar Gorge cuts through the Erramalai ranges in steep bands of red quartzite, and the same terrain that looks dramatic from the viewpoint becomes loose scree, angled slabs, and unstable boulders once you start down toward the Penna River. Add direct sun, limited shade, scarce water access, and wind at the rim, and this stops being a casual walk around a fort.
The right Gandikota canyon trekking gear checklist is less about carrying everything and more about carrying the things that prevent small problems from becoming route-ending ones. Footwear, water, sun protection, a reliable light, and a plan for the descent matter more here than an overfilled backpack. The gorge is manageable when you move deliberately. It becomes unforgiving when you rush, improvise, or assume the return will be easier than the way down.
Footwear and Traction for Sandstone Terrain
Your footwear is the most important part of your setup. Loose sandstone and red quartzite reward a steady step and punish soles that slide, fold, or fill with grit. The route toward the river can shift from a graded path to a boulder field and then to steep slabs where balance matters more than speed.
For Gandikota gorge hiking safety gear, look for:
- An aggressive lug pattern — multidirectional tread helps the sole bite into loose ground and shed sand instead of packing with it.
- A grippy rubber compound — hard, smooth soles tend to skate across dusty rock, particularly on angled sections.
- A secure heel and stable upper — your foot should not move inside the shoe when you place it on a sloping boulder.
- Moderate ankle coverage — a mid-cut boot can offer useful stability for trekkers carrying a pack, although ankle height does not replace careful foot placement.
- A reinforced toe box — the descent includes rocks, gaps, and awkward steps where your toes will meet the terrain sooner or later.
- A sole that still flexes naturally — a completely rigid boot can make scrambling uncomfortable, while an overly soft sole leaves you feeling every sharp edge.
Trail runners with a deep tread can work for experienced hikers who are comfortable moving quickly over uneven ground and who are travelling in dry conditions. For many visitors, a proper hiking shoe or boot with a stable heel is the more forgiving option. Fashion sneakers, smooth-soled trainers, and open sandals are poor choices for the canyon. They offer little traction, little protection from sharp rock, and very little confidence once the path becomes irregular.
Do not make the first serious test of a new pair on the rim. Wear the shoes on a few shorter walks first. Walk over loose gravel and uneven ground, climb stairs, and carry the pack you expect to use. Pay attention to heel lift, rubbing at the toes, pressure across the instep, and any hot spot that appears after repeated descents. A small irritation near the fort can become a blister halfway down the canyon.
Socks are part of the footwear system. Choose a pair that stays in place and manages moisture without bunching under the heel or across the toes. Carry a spare pair in a sealed bag if you are spending a full day outside. Grit and sweat inside the shoe are a reliable way to turn a manageable walk into a painful one.
Gaiters are not essential for every visitor, but low gaiters can be useful on dry, dusty sections. They keep sand and small stones from entering the shoe, particularly when you are walking behind someone on a loose slope. Choose a lightweight pair that does not restrict your ankle or trap unnecessary heat around the calf.
Your feet touch every step. If the boot fails, the hike becomes a problem long before the view does.
A good trekking shoe also changes how you move. Take shorter steps on loose ground, keep your weight over the middle of the sole, and avoid twisting the foot while it is planted. If you need to turn, move the whole body rather than pivoting sharply on one foot.
Hydration Strategies for the Erramalai Ranges
Water planning should happen before you leave the fort area or the main access point. Availability can be limited along the rim and on the route toward the river, and you should not build your plan around finding a convenient refill exactly when you need one. The heat, exposed rock, and exertion of a descent can make a short route feel much longer than it looked from above.
For a straightforward trek, carry enough water for the route, the return, and a delay. A practical setup is:
- A main reservoir — a two-litre bladder makes it easier to drink regularly while walking.
- A separate bottle — useful for quick access, mixing electrolytes, or keeping a reserve independent of the bladder.
- Electrolyte tablets or sachets — useful during prolonged sweating, especially if you are outside for several hours.
- A small reserve kept unopened — do not treat every drop as available for immediate consumption; an unexpected delay changes the calculation.
- A water-treatment option — if your route or activity involves a legitimate refill point, use an appropriate filter or treatment method rather than assuming clear-looking water is safe.
The amount you carry should reflect the route, season, time outside, and whether you are adding kayaking or other activity. Someone walking to a viewpoint and returning early has different needs from someone descending to the river, waiting there, and continuing with a water-based excursion.
| Hydration scenario | Planning approach | Why it matters |
|---|---|---|
| Short trek with an early return | Carry a personal supply with a reserve rather than relying on shops | A short route can still involve sun exposure and a slower return |
| Descent toward the river | Carry enough for the descent and the climb back, not only the outward leg | The return is usually the more demanding part |
| Trek combined with kayaking | Add water for the time before and after the river activity | Water carried on a boat may not be convenient during the whole outing |
| Hot or exposed conditions | Increase the reserve and shorten rest intervals in direct sun | Heat changes both comfort and the pace at which the group moves |
| Group travel | Keep individual water with each person and carry a shared reserve | One person should not become responsible for everyone’s only supply |
Drink regularly instead of waiting until you are uncomfortable. Small, consistent sips are easier to manage while walking than trying to compensate with a large amount during one stop. Begin the day hydrated, but do not treat a large drink before departure as a substitute for carrying water on the trail.
Electrolytes can be useful when you have been sweating for a prolonged period, but they do not make unsafe conditions safe. They also do not replace food, shade, or a decision to turn around. If someone develops a headache, unusual weakness, nausea, confusion, cramps, or an unsteady gait, stop the route and move the group to shade if possible. Continuing to push toward the river is not a sign of toughness; it is a poor risk calculation.
A bottle with a wide opening is easier to refill and clean. A bladder is convenient while walking but should be checked for leaks before the trip. Keep one bottle or pouch accessible without removing the entire pack. When a group stops, place the water where nobody has to stand beside a drop or scramble across loose rock to reach it.
Sun Protection and UV-Resistant Apparel
The canyon offers less shade than the photographs suggest. Red rock reflects light, exposed sections hold heat, and the rim can feel more comfortable than the lower route without giving you a reliable indication of how much sun you are taking in. In the hotter months, temperatures can reach around 40°C, making clothing and pacing important parts of Gandikota outdoor adventure preparation.
Sun protection is not only a matter of avoiding a red face at the end of the day. A burned neck, irritated eyes, or overheated clothing can make it harder to concentrate on uneven terrain. Pack the basics before you start:
- A broad-brimmed hat or a cap with neck coverage — a standard cap leaves the ears and the back of the neck exposed.
- Sunglasses with good glare protection — bright rock can make it difficult to read the surface of a slab or distinguish loose gravel from solid ground.
- Water-resistant sunscreen — apply it to the face, ears, neck, arms, and any exposed section of the legs; reapply after heavy sweating.
- A lightweight long-sleeved shirt — breathable fabric with UV protection provides coverage without the weight of a heavy cotton layer.
- Light trekking trousers — they help with both sun and contact with rough boulders.
- A neck gaiter or scarf — useful for extra coverage when the sun is high and for keeping dust off the skin.
Breathable, light-coloured clothing can feel more comfortable in direct sun, while darker or heavier fabrics may feel hotter. That is a comfort and exposure-management consideration, not a reason to believe that one shirt colour will determine your core temperature or compensate for poor pacing. Choose clothing that dries reasonably quickly, does not restrict your shoulders, and can be layered or removed as conditions change.
A damp bandana or neck gaiter may feel cooling when the air is hot. It can make a rest stop or an exposed section more comfortable, but it is not a guaranteed cooling system and does not extend the amount of time you can safely remain in the heat. Keep drinking, use shade when it is available, and slow down before fatigue affects your footing.
The most useful sun-protection habit is simple: cover the back of your neck and check the people around you. Visitors often notice sunburn only after they return to the fort, when the damage is already done. A hat that stays on in the wind, sunscreen that is easy to reach, and sleeves that you will actually wear are better than highly technical clothing left at the bottom of the pack.
Clothing can make the heat more bearable, but it does not cancel the heat. Shade, water, and sensible pacing still do the real work.
Navigating the Descent to the Penna River
The route from the canyon rim to the Penna River may look short from above. The difficulty is not only the distance. It is the changing surface, the need to choose a line through boulders, and the fact that every downward step becomes an upward step on the return.
The upper part may feel straightforward, but lower sections can require hands for balance and careful placement of both feet. Treat the boulders as uneven terrain rather than a natural staircase. Some rocks are loose, some are polished by repeated traffic, and some appear stable until you load them.
Use a deliberate sequence:
1. Stop before each awkward section. Look at the next two or three placements rather than stepping onto the first rock you see.
2. Test uncertain holds and footholds. Press lightly before transferring your weight. If a rock shifts, route around it.
3. Keep three points of contact when the surface steepens. Two feet and one hand, or two hands and one foot, give you more control than trying to stride across.
4. Leave space between walkers. A person above can dislodge a stone, and a person below needs room to react.
5. Do not let the fastest member set the pace. The group should move at the speed of the least confident person on the technical section.
6. Turn around before fatigue becomes poor judgment. The river is not the objective if the return will happen without enough water, light, or energy.
A daypack in the 15–20-litre range is usually easier to control than a large hiking pack for a day outing. Keep the weight close to your back and avoid loose objects that swing when you scramble. Your basic load should include:
- Water for the full route with a reserve
- Electrolytes and compact food such as nuts, bars, or dried fruit
- Sunscreen, hat, and sunglasses in an accessible pocket
- A small first-aid kit with blister care, dressings, and any personal medication
- A headlamp with charged batteries, even if you expect to return in daylight
- A whistle attached to a shoulder strap
- A fully charged phone and a power bank
- A light rain shell during the monsoon season
- A sealed bag for documents, electronics, and any item that must stay dry
A power bank is useful because charging access may be limited around the fort, rim, and campsites. Keep the phone in an accessible but protected place, and conserve battery by lowering screen brightness and using offline maps where available. A dead phone is not automatically an emergency, but it removes useful options for communication, navigation, and coordination.
If your outing continues onto the Penna River, treat it as a separate activity rather than assuming the trekking kit is enough. The additional equipment should include:
- A properly fitted personal flotation device — wear it on the water rather than storing it beside the boat.
- Closed-toe water shoes — useful on rocky or slippery river edges and more secure than loose sandals.
- A dry bag for the phone and documents — keep it closed and attached in a way that does not interfere with movement.
- A helmet where the operator requires one — follow the outfitter’s instructions and check what is supplied before the launch.
Do not hurry the last part of the descent because the river is visible. The view creates a false sense of arrival, but the hardest footing may still be below you. Save enough attention for the climb back.
Cliff-Edge Safety and Wind Awareness
Gandikota’s rim is the place where sightseeing habits and trekking habits collide. Visitors move toward the edge for photographs, while hikers are already tired from the approach and may focus more on the view than the surface beneath them. The rock can be uneven, the edge may be undercut or crumbly, and wind can arrive in irregular gusts.
Keep a clear margin from an unguarded edge. Two metres is a sensible minimum in ordinary conditions; more distance is appropriate when the surface is loose, the ground is wet, visibility is poor, or the wind is pushing across the rim. The exact distance matters less than refusing to treat the edge as a place to balance, sit, or lean out for a photograph.
Use a simple group protocol:
- Keep nobody at an exposed edge alone.
- Put heavy packs on stable ground well away from the rim.
- Move in single file through narrow or exposed areas when the wind increases.
- Face inward while stepping near uneven ground instead of walking backward for a photograph.
- Keep children and distracted photographers away from loose sections.
- If someone feels dizzy, nauseous, weak, or unsteady, have them sit or move to a secure area and bring the group to them.
- Do not climb barriers, walk onto overhanging slabs, or cross a section simply because someone ahead has done it.
Wind is not only a comfort issue. It can affect balance, send dust into your eyes, and move hats or loose clothing into your line of sight. If you are repeatedly adjusting your hat, squinting against debris, or leaning to stay upright, step back and find a more sheltered position. Secure loose straps before reaching the rim.
The best photograph is rarely worth standing on unstable ground. Use a stable viewpoint, keep both feet planted, and let the camera remain secondary to the surface beneath you. The gorge will still be there when you step away from the edge.
The rim is a viewing point, not a balance beam. Give the wind and the rock enough respect to keep your attention on the ground.
Before You Start: When to Turn Back
The safest decision is often made before the descent. Check the forecast, inspect the footwear, distribute the water, and agree on a turnaround point while everyone is still fresh. Once the group is committed to the lower route, social pressure can make a sensible retreat feel like a failure.
Postpone the trek or change the plan when:
- Strong winds, thunderstorms, or extreme heat are expected.
- The group includes someone with an unresolved ankle, knee, or back problem.
- Any person has insufficient water for the planned route and a reserve.
- Shoes have separated soles, damaged laces, worn tread, or poor heel security.
- A member is already showing signs of heat stress before the descent begins.
- The route would put the group on exposed terrain in fading light.
- No one has a working phone, basic light, and a way to signal for help.
- The weather has made the rock wet or the footing less predictable.
- The group cannot agree on a pace that the least confident walker can maintain.
A local guide can be especially useful when the descent line is unclear, when the group includes first-time hikers, or when the outing combines trekking with river activities. A guide is not a substitute for proper footwear and water, but local route knowledge can reduce unnecessary wandering and help the group recognise when conditions have changed.
Pack the essentials where you can reach them without emptying the bag. Water should not be buried under a rain shell; sunscreen should not be trapped beneath food; the whistle should not be inside a sealed pouch. Small decisions about access matter when the trail is hot and uneven.
Gandikota does not require expedition equipment, but it does require respect for simple fundamentals. Wear footwear that can hold on loose rock, carry more water than the optimistic version of the route demands, cover yourself from the sun, and treat the descent as the technical part of the day. At the rim, leave space for wind and unstable ground. On the return, keep enough energy for the climb you cannot see from the viewpoint.
That is the practical version of what to pack for a Gandikota adventure: not a heroic load, just dependable gear and the discipline to use it before the canyon forces the issue.