Gandikota summer trip: essential gear and hydration checklist
A summer trip to Gandikota is less forgiving than a casual fort visit suggests. The famous gorge viewpoint, the inner fort paths, and the approach to the canyon all expose you to heat, glare, dust, and long stretches without dependable services.
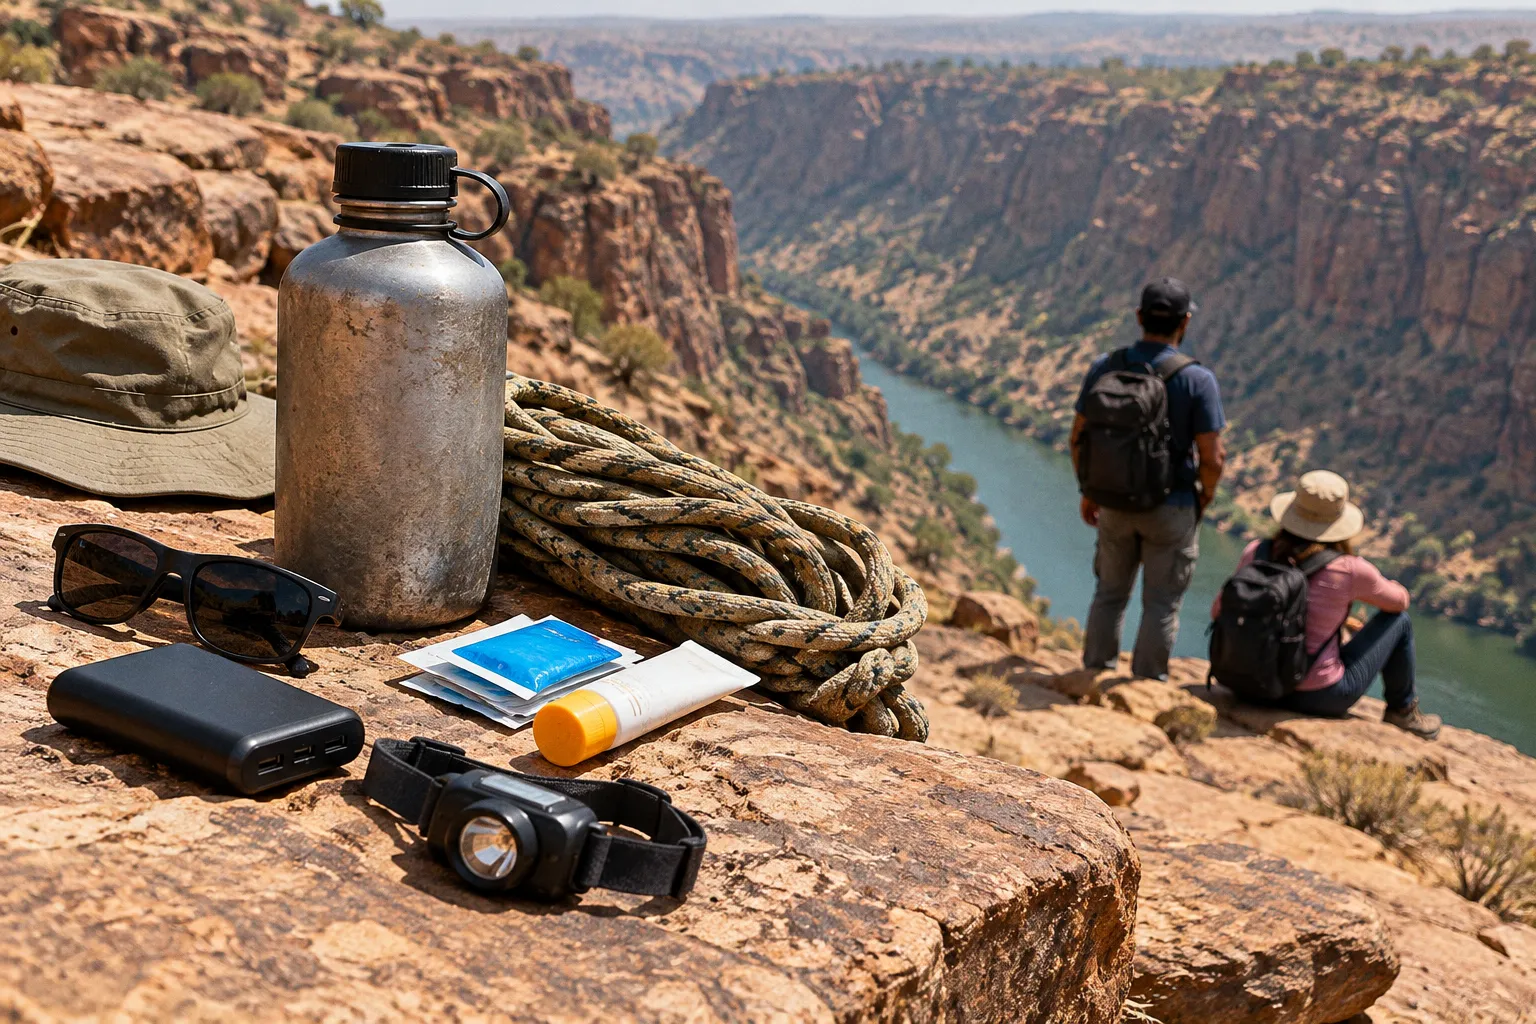
On a hot afternoon, the ambient temperature can reach 41°C (106°F), and the stone surfaces offer little relief once the sun is high.
That changes the packing logic. This is not a place for a small bottle, a cotton shirt, and the assumption that refreshments will appear when needed. A sensible gandikota trip packing list for summer is built around water, shade, sun protection, navigation, and the ability to leave the exposed sections before fatigue becomes a problem.
The 1.5 km walk to the viewpoint is manageable for most visitors, but distance alone is a poor measure of difficulty. Heat turns a short walk into a demanding one, especially when you add the fort ramparts, uneven ground, photography stops, and the return journey.
Treat the two-liter water capacity as a starting point for a half-day summer outing, not as the amount you plan to finish only if you get thirsty.
Managing the 41°C Heat: Hydration and Electrolyte Strategy
Water is the first item to organize and the easiest one to underestimate. Services around a major tourist site may be limited, and a viewpoint is not the same thing as a staffed trailhead with a dependable water station. Carry your own supply from the start rather than building the day around a tap, shop, or hotel stop.
For one person spending several hours outdoors, a practical arrangement is:
- Two liters of drinking-water capacity as a minimum starting point for a half-day excursion.
- One insulated bottle for water you want to keep cool, plus a hydration bladder or second bottle for regular access.
- Oral rehydration salts or an electrolyte product in a sealed pouch.
- A small reserve for unexpected delays, particularly if you are travelling with children, older relatives, or anyone who tends to drink slowly.
- A reusable bottle that can be refilled when a verified source is available, rather than relying on disposable bottles found at the last stop.
A bladder is useful because it makes drinking easier while walking. It also has a weakness: you may not notice how quickly it is emptying. Check the remaining volume at breaks. If you are using bottles, do the same before leaving the hotel or vehicle.
The right drinking pattern is steady rather than dramatic. Take regular sips during the exposed sections and drink before setting out, instead of waiting for strong thirst. There is no universal milliliter schedule that suits every visitor: body size, pace, clothing, shade, food, and acclimatization all change the requirement. The practical rule is to make water accessible and to monitor how you feel.
Electrolytes are useful when you are sweating for several hours, but they are not a substitute for water or a treatment for serious heat illness. Follow the instructions on the packet. Do not keep adding sachets simply because the day is hot, and do not assume that a sweet sports drink is equivalent to oral rehydration salts.
Avoid making alcohol part of a summer canyon outing. Strong coffee and very sweet drinks are also poor substitutes for a proper water supply. The problem is not that one cup automatically causes dehydration; it is that these drinks can displace the water you actually need and may sit badly in the heat.
What to monitor during the walk
Heat-related problems often begin as a collection of small warnings rather than one dramatic event:
- unusual fatigue or weakness;
- headache, dizziness, nausea, or irritability;
- muscle cramps;
- clumsy walking or difficulty concentrating;
- a rapid pulse or a feeling that the effort is suddenly much harder than it should be.
Stop in shade or the coolest available place if these symptoms appear. Loosen unnecessary layers, cool the skin with water or a damp cloth, and drink in small amounts if the person is alert and able to swallow. Do not push on to the viewpoint to “finish the route.” If symptoms are severe, worsen, or include confusion, fainting, seizures, or loss of consciousness, treat it as an emergency and seek medical help immediately. Heat exhaustion does not follow a fixed countdown into heat stroke; the safest response is early intervention and an early exit.
Sun Protection and Breathable Apparel for Canyon Exposure
The essential gear for Gandikota canyon is not technical equipment for its own sake. It is clothing that keeps direct sun off the skin without trapping heat. The fort and gorge combine exposed walking with stone surfaces that reflect brightness back toward the face and neck. A sleeveless shirt and a cap may feel light at the start, then leave the shoulders, ears, and back of the neck unprotected for the rest of the day.
Choose garments for ventilation, coverage, and quick drying:
- A loose, long-sleeved shirt made from a breathable synthetic fabric or lightweight woven material.
- Lightweight trousers for the main walk, especially if you expect dust, rough stone, or brush.
- A spare shirt in a dry bag if you are staying overnight or continuing to another stop.
- A wide-brimmed hat or a cap combined with a neck-covering buff.
- A light scarf or buff that can protect the neck from direct sun without being wrapped tightly.
- Comfortable walking shoes with a secure sole. Open sandals are less useful on uneven fort paths and expose feet to dust and hot ground.
- Thin socks that dry quickly and do not bunch inside the shoe.
A fleece or heavy mid-layer is usually unnecessary for the main heat of the day, but an early start can feel cooler than the afternoon. One light layer is more versatile than a bulky jacket. A compact wind layer can help with dust and wind near exposed edges, but it should not become a reason to keep walking when the heat is already building.
Face, eyes, and exposed skin
Sunscreen should cover the ears, neck, nose, forearms, and the backs of the hands—not only the face. Apply it before leaving and carry enough for reapplication. Sweat, dust, wiping your face, and time outdoors all reduce the protection you started with. A small tube is convenient for a short visit, but a longer stay or a group needs more than one person’s emergency supply.
Sunglasses are especially useful around pale or reddish stone. Choose a comfortable pair with proper UV protection and lenses dark enough for strong daylight. Polarization can reduce glare, although fit matters more than branding. Keep a spare pair only if someone in the group depends on glasses; losing eye protection on an exposed trail is an avoidable problem.
A lip balm with sun protection belongs in the same pouch as the sunscreen. Dry, cracked lips are not a medical crisis, but they make an already uncomfortable day harder. The same applies to the neck and scalp: coverage is usually more dependable than trying to replace it with repeated sunscreen application.
In Gandikota, the best sun-protection item is often the one you put on before the first photograph, not the one you remember after your skin starts burning.
Power and Navigation Essentials for Remote Fort Exploration
Gandikota is a destination where a phone is useful but should not be treated as the entire navigation system. Signal quality can vary by exact location, and service may be less dependable inside the gorge or around thick stone walls. Carrier-specific coverage should not be assumed. Download what you need before leaving a reliable connection.
Your electronics kit should include:
- A charged phone with offline maps covering the approach, the fort area, and the route back to your accommodation.
- A power bank with enough capacity for a full day of navigation, photos, and calls.
- Charging cables that match every phone in the group.
- A small headlamp, particularly if your day begins early, ends late, or includes camping.
- A physical note with the accommodation name, key phone numbers, and an emergency contact.
- A simple compass if you are planning to leave the main visitor paths.
- A weather-resistant pouch for the phone, power bank, and paper information.
Take a screenshot of the route before you set out. Mark the hotel, vehicle location, entrance, and any agreed meeting point. Do not rely on a map application to recalculate after you have already entered an area with weak service.
The main fort visit and a descent toward the riverbed are different kinds of outing. A marked or familiar visitor route does not make every secondary path safe. Loose surfaces, steep sections, heat, and the difficulty of getting assistance can turn a casual detour into a serious problem. If you do not know the route, do not improvise a descent simply because it looks short from above.
For camping, add a headlamp for every person rather than assuming one light can be passed around. Pack spare batteries or a second charging option appropriate to your device. Keep the light where you can reach it without unpacking the entire bag.
Logistics of Moving Between Jammalamadugu and the Gorge
The transfer to Gandikota is part of the trip, not an administrative detail to solve after arrival. Jammalamadugu is the practical reference point for many visitors approaching the site, while the gorge itself has limited services. Arrange the final leg with enough daylight and keep water accessible during the transfer.
Before leaving Jammalamadugu, confirm:
- where you will be dropped off and collected;
- whether the driver is waiting or returning at an agreed time;
- how you will identify the vehicle;
- whether your accommodation is inside the fort area or at a separate property;
- where you can obtain water and basic supplies before entering the exposed area.
The APTDC Haritha Hotel is approximately 1.2 to 1.4 km from the gorge rim, so a hotel stay does not necessarily place you beside every viewpoint or trail entrance. That distance is easy to dismiss on a map and less pleasant when you are carrying water in the heat. Pack the day bag before leaving the room rather than assuming you can return for forgotten items.
Transport availability and prices can change with the season, local demand, and time of day. Confirm the return plan locally, especially if you are arriving by bus or shared transport. A vehicle that brings you to Gandikota may not automatically be available when you want to leave.
Winter is a busier travel season, so accommodation planning deserves more attention then. Do not treat summer availability as a promise, either: conditions change, and small properties may have limited operating schedules. Confirm directly through the relevant accommodation or tourism contact before committing to a route that depends on a particular room, meal, or facility.
The same caution applies to payments. Services around the gorge may be limited, and connectivity or acceptance methods can vary. Carry some cash in small denominations while keeping it separate from your phone and cards. At the same time, do not carry more money than the trip requires. Think of cash as a backup for a low-service destination, not as proof that every vendor will accept it.
Food planning belongs here as well. Carry compact food that tolerates heat: bananas for a short transfer, packaged flatbread, nuts, biscuits, sandwiches kept safely, or other familiar options. Avoid packing food that spoils quickly unless you have reliable cooling. A salty snack can be useful after sweating, but it does not replace a meal, water, or rest.
Optimizing Your Daypack for the 1.5 km Trek to the Viewpoint
A small daypack is enough for the viewpoint walk if the main luggage stays at the hotel or in a secure vehicle. The correct size depends on whether you are carrying camping equipment, shared water, camera gear, or supplies for children. For a normal sightseeing walk, the goal is not the smallest possible bag; it is a bag that keeps essentials reachable without turning the outing into a weight-carrying exercise.
Pack by frequency of use rather than by category:
1. Water first. Put the bottle or bladder where you can reach it without removing the bag. Do not bury the main supply under clothing.
2. Sun protection next. Keep sunscreen, sunglasses, hat, and buff in an outer pocket or the top compartment.
3. Navigation and power together. Phone, power bank, cable, and paper details should stay in a sealed pouch.
4. Food and electrolytes in a separate bag. This keeps powder sachets away from damp bottles and makes a snack break quick.
5. Light and first aid where they can be reached. A headlamp, plasters, basic pain relief, and any personal medication should not be at the bottom.
6. Extra layer and rain protection last. A thin overshirt, compact wind layer, or lightweight rain shell can sit against the back or above the heavier items.
A useful daypack load includes:
- two liters of water capacity;
- electrolyte or oral rehydration supplies;
- sunscreen and lip balm;
- hat, sunglasses, and neck covering;
- phone, offline map, and power bank;
- headlamp if there is any chance of returning after dark;
- a small first-aid pouch;
- personal medicines;
- tissues or toilet paper in a sealed bag;
- hand sanitizer;
- a compact snack;
- a light layer or rain cover;
- a small waste bag for carrying everything back out.
Keep the heaviest item close to your back and adjust both shoulder straps. A loose, low-hanging bag pulls on the shoulders and makes walking feel harder. Do not fill every pocket simply because space is available. Camera accessories, extra lenses, tripods, and large bottles add up quickly, and the final section is still the same exposed walk back.
There is no universal safe pack weight for a hot day. A healthy adult carrying five kilograms may manage it comfortably in one situation and struggle in another, depending on water, footwear, pace, fitness, and acclimatization. The better rule is to remove anything that does not support water, shade, navigation, safety, or the reason you came. If the bag is already uncomfortable before you start, it will not become more comfortable on the return.
A simple group-sharing plan
Groups can reduce duplicate gear without leaving one person responsible for everything. Share sunscreen, first aid, a larger power bank, a printed route note, and a basic repair kit. Keep water and personal medication individual. Each person should also carry a phone, identification, and enough personal drinking capacity to avoid being separated from the group’s main bottle.
Children and older travellers need a slower plan, more shade breaks, and closer attention to symptoms. Do not make the strongest walker set the pace for everybody. The group should agree on a meeting point before spreading out for photographs.
Timing the Visit and Knowing When to Turn Back
The safest packing list cannot compensate for a poor start time. Plan the main walking before the strongest afternoon heat, and treat the hottest part of the day as a reason to rest, eat, travel, or stay indoors rather than as a challenge to overcome. An early start is valuable because it gives you more options: you can finish the viewpoint, return to the hotel, and still have energy for a change of plan.
Check the actual weather forecast before leaving. A forecast can tell you whether heat, wind, rain, or storms may affect the route, but it cannot tell you how your body will respond. Use the first part of the walk as an honest assessment. If the pace feels unusually hard, the return is already becoming difficult, or someone is avoiding water because of nausea, shorten the outing.
Do not continue toward the viewpoint when a member of the group becomes confused, unsteady, faint, severely nauseated, or unable to drink. Move to shade, cool the person, and seek help. If the symptoms are serious or do not improve promptly, arrange medical assistance rather than attempting to carry on or drive while the person is deteriorating.
Gandikota rewards a prepared visitor, but preparation here is not about buying specialist equipment. It is about respecting the combination of a 41°C summer afternoon, exposed stone, a 1.5 km approach, limited services, and the distance between the sightseeing route and the next reliable stop. Carry two liters of water, cover your skin, download the route, keep the bag light, and plan the return before you begin the walk. That is the practical foundation of a safe what to pack for a Gandikota weekend plan.