Gandikota rock climbing routes: a guide for beginners
Gandikota rock climbing is beginner-friendly only when you treat the red sandstone seriously. The guided climbing faces near Gandikota Fort rise roughly 30 to 50 feet, with gradients from a manageable 60 degrees to a near-vertical 90 degrees.
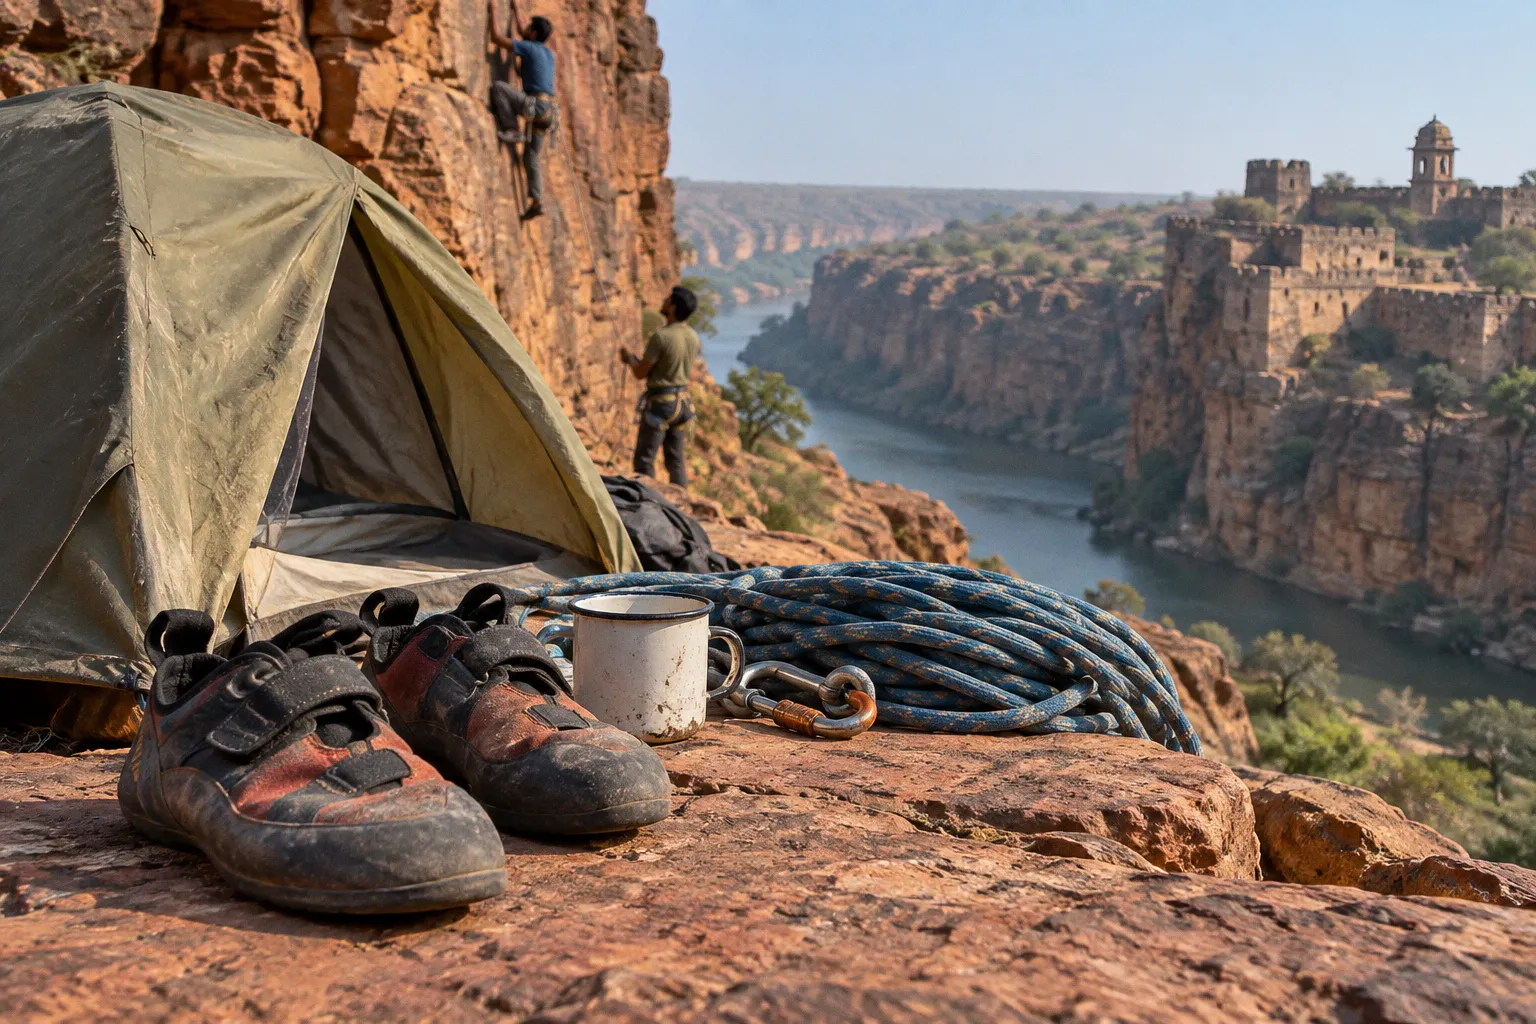
That range is enough to expose weak footwork, poor grip discipline, and careless belay habits very quickly.
Most first-timers climb on organized top-rope systems with helmets, harnesses, ropes, and an instructor controlling the session. You are not arriving at a fully mapped sport-climbing crag with standardized grades and permanent bolts across every gorge wall. You are entering a rugged canyon environment where operators select suitable faces, build a controlled setup, and move beginners through the route one sequence at a time.
The difference matters. You are not just choosing a scenic rock wall. You are choosing a managed climbing zone beside a deep Pennar River gorge, with loose sandstone, sharp edges, exposed approaches, heat, and limited margin for sloppy decisions.
Navigating the red sandstone cliffs of the Pennar Gorge
Gandikota sits in Kadapa district, Andhra Pradesh, beside the Pennar River gorge. The canyon drops roughly 300 feet above the river in places, and the historic fort stands close to the main sightseeing and adventure area. The climbing activity is concentrated around the red sandstone cliffs and boulder fields near the fort rather than spread evenly across the entire gorge.
That gives beginners a practical advantage: you can reach a guided climbing setup without committing to a remote wilderness approach. The main adventure sports facility and briefing area sit roughly 1 kilometre from the Gandikota Fort premises. You can combine the climbing session with the fort, gorge viewpoints, and other outdoor activities without hauling a full expedition pack across the canyon.
But do not mistake access for low risk. A short approach can still include:
- Uneven sandstone slabs that shift under foot.
- Loose fragments and sharp rock edges.
- Unprotected drop-offs near viewpoints and gorge edges.
- Strong sun exposure with little usable shade.
- Dust that reduces friction on holds and footwear.
- Narrow or awkward stances around the base of a climbing face.
- Sudden fatigue after walking, sightseeing, or carrying equipment.
Keep your hands free on the approach. Grip the rock only when the instructor directs you to use it as part of the climb. Do not scramble onto an unroped edge to take a photograph. Do not step beneath an active route unless the climbing team has cleared the landing and overhead zone.
Gandikota gives you a controlled introduction to climbing—not permission to improvise on an uncontrolled cliff.
Where beginners actually climb
For most visitors, the practical starting point is a guided top-rope session near the organized adventure facility. The rope runs from an anchor above the climbing line, down through the top of the route, and to the climber below. A belayer manages the rope while the instructor controls the system and gives movement instructions.
This format changes the experience. You focus on body position, foot placement, breathing, and route reading instead of trying to lead a route or place protection. The rope system reduces the consequences of a slip, but it does not remove them. You still need a correctly fitted harness, a secured helmet, a competent belay, and a route that matches your ability.
Natural bouldering is also available around the red sandstone formations. Bouldering keeps the climber close to the ground and uses short movement problems rather than a long roped pitch. It can look casual. It is not automatically harmless. A bad landing can damage an ankle or knee, especially on uneven sandstone where a flat fall zone may not exist.
Treat every boulder problem as a movement exercise with a landing plan. Check where your feet will go if you lose the hold. Identify the spotter position. Remove loose stones from the landing area. If the ground is sloping, broken, or crowded, skip the move.
Technical specifications: wall height and gradient
The beginner climbing pitches around Gandikota commonly range from approximately 30 feet to 50 feet, or about 9 to 15 metres. The wall gradient runs from roughly 60 degrees to 90 degrees.
Those numbers describe the physical demand better than a vague label such as easy or moderate.
A 60-degree slab generally rewards balance and precise footwork. You may feel less upper-body strain because the wall allows your weight to stay over your feet. That does not mean you can stomp around. Slab climbing punishes careless steps. Small holds and dusty surfaces demand quiet movement.
As the angle approaches vertical, your arms carry more of the load if your hips drift away from the wall. Beginners often squeeze every handhold and pull upward with bent elbows. That burns the forearms quickly. Keep your arms as straight as the position allows. Push through your legs. Move one limb at a time. Keep three points of contact when the instructor calls for controlled movement.
The most useful technical distinctions look like this:
| Climbing feature | What it demands | Common beginner error |
|---|---|---|
| 30-foot wall | Shorter exposure and a manageable first pitch | Rushing because the route appears brief |
| 50-foot wall | More sustained movement and greater fatigue | Ignoring forearm fatigue until grip strength collapses |
| 60-degree slab | Balance, edging, and weight over the feet | Pulling on holds instead of trusting foot placement |
| 90-degree face | Leg drive, hip positioning, and efficient grip | Hanging on bent arms and over-gripping |
| Red sandstone holds | Careful contact and controlled loading | Crimping sharp edges or yanking loose features |
| Guided top-rope setup | Communication and system discipline | Climbing before the belayer and instructor confirm readiness |
Do not chase the tallest available wall on your first attempt. Start on the face that lets you learn the movement pattern without turning every step into a fight. A shorter route climbed cleanly with controlled feet teaches more than a taller route where you panic, over-grip, and depend entirely on the rope.
Read the route before you leave the ground
Stand at the base and scan the face. Locate the obvious footholds, larger handholds, changes in wall angle, and sections where the surface appears broken or dusty. Ask the instructor where the route traverses, where the difficult section sits, and what signal means stop, lower, or take in rope.
Then climb with a sequence:
1. Place the strongest foot first, using the inside edge of the shoe rather than the soft middle of the sole.
2. Keep your hips close to the wall when the face becomes steep.
3. Straighten your arms whenever the hold and body position allow it.
4. Shift your weight over the new foothold before reaching.
5. Look for the next foothold before you pull on the next handhold.
6. Pause on stable positions and shake out one hand at a time if your forearms tighten.
7. Call clearly when you need rope, rest, or a lower.
Do not make large movements simply because the route looks dramatic from below. Short, balanced movements preserve energy. If a hold feels loose, do not load it aggressively. Tell the instructor and move to another feature.
Safety protocols for guided climbing sessions
Your climbing session starts before your hands touch the sandstone. The briefing is part of the activity, not a formality between registration and the first attempt.
A competent setup should cover the route, the rope system, the equipment, the communication signals, and the landing or exclusion zone. Listen for the exact commands used by that operator. Do not assume that a hand signal or shouted phrase means the same thing across different groups.
Fit the equipment before you move to the wall
The basic climbing system should include a climbing helmet, harness, rope, carabiners, and a belay arrangement managed by trained staff. Operators may supply climbing shoes or use suitable closed footwear depending on the activity format.
Check the following before starting:
- The helmet sits low enough to protect the forehead without blocking vision.
- The harness fits firmly around the waist and legs without twisting.
- Buckles are doubled back or secured according to the harness design.
- The rope connection sits at the correct tie-in or attachment point.
- Carabiners are closed and locked where the system requires locking gates.
- Loose straps, camera cords, scarves, and bags cannot catch on the rope.
- The instructor completes a partner or system check before you climb.
Never adjust the rope, anchor, belay device, or carabiner configuration because you saw someone do it in a climbing video. Ask the instructor. Keep your hands away from the belay device unless the instructor has trained you to operate it and is supervising the process.
Respect the sandstone
Red sandstone can provide positive holds and interesting movement, but it can also break, crumble, or cut. Avoid snapping small edges sideways. Do not pry at flakes. Do not test every hold with your full body weight. Use a controlled touch first, then load the feature gradually.
Wear clothing that allows your knees and shoulders to move. Closed footwear with a secure sole is essential for the approach and useful for beginner climbing if dedicated climbing shoes are not part of the session. Gloves are not a substitute for grip technique. They can reduce tactile feedback and may catch awkwardly around equipment.
Keep the wall base organized. Place water bottles and personal gear away from the fall line and rope path. If another climber is on the face, stay outside the zone below the route unless the instructor gives you a specific task. Call out before moving beneath a rope or crossing the working area.
Heat changes your climbing decisions
Gandikota’s open canyon environment can drain you before the route starts. Walk the approach at a controlled pace. Drink water before you feel depleted. Eat enough to maintain concentration, especially if you are combining climbing with fort exploration or gorge trekking.
Stop when you develop dizziness, headache, nausea, confusion, unusual weakness, or a loss of coordination. Those symptoms do not make you tough. They make you less capable of gripping, stepping, listening, and communicating. A climbing session can be rescheduled. A heat-related collapse beside a canyon wall is a serious emergency.
Weather and surface conditions also matter. If rain has made the sandstone wet, slippery, or unstable, follow the operator’s decision to delay or cancel. Do not pressure a guide to continue because you travelled a long distance. The route does not care how far you drove.
Gandikota gorge climbing difficulty levels
Gandikota does not currently offer beginners a single, universally published grading system for every natural climbing line across the gorge. You may find commercial sessions described by wall height, angle, or general ability rather than by a complete French, UIAA, or Yosemite Decimal System route catalogue.
That means you should choose by movement demand and exposure, not by chasing a grade number that may not describe the local setup.
Ask the operator to match you to:
- A lower-angle face if you have never climbed before.
- A shorter top-rope route if you are uncomfortable with height.
- A route with larger holds if your grip strength is limited.
- A controlled boulder problem if you want to learn basic movement close to the ground.
- A less exposed section if heat, fatigue, or fear affects concentration.
- A longer pitch only after you demonstrate safe movement and clear communication.
Your first route should test technique, not your willingness to tolerate panic. If you cannot hear the instructor, stop. If your harness shifts, stop. If the rope becomes tangled or catches around a feature, stop and communicate. Do not keep climbing while trying to solve a system problem with one hand.
What makes a route feel harder than its angle suggests
A 60-degree wall can feel difficult when the holds are dusty, the footholds are small, or the route forces a long balance move. A vertical face can feel manageable when it offers good handholds and clear footholds. Height also changes perception. A climber may move efficiently at 10 feet and freeze at 30 feet despite having enough strength for the route.
Watch for these difficulty multipliers:
- A long section without a comfortable rest position.
- A sharp transition from slab to vertical rock.
- Small footholds that require edging.
- Holds that face away from the direction of movement.
- Loose or sandy features.
- Sun exposure that accelerates fatigue.
- A crowded base that disrupts communication.
- Fear that causes you to grip harder and breathe less.
Use the rope as protection, not as a tow line. If you are hanging continuously from the rope, lower under instruction and reset. A controlled descent is a successful decision. It gives you information about the route and your current limit.
The cleanest beginner ascent is not the one that reaches the highest point. It is the one that keeps your feet, rope, breathing, and decisions under control.
Bouldering, rappelling, and the wider adventure session
Rock climbing is only one part of the Gandikota outdoor program. Adventure operators also offer bouldering, rappelling, kayaking on the Pennar River, and gorge trekking. Combining activities can make the trip worthwhile, but it also creates a recovery problem: each discipline loads your body differently.
Bouldering taxes your fingers, wrists, hips, and landing mechanics. Rappelling demands harness discipline, brake-hand control, and attention at the edge. Kayaking adds paddling fatigue and water exposure. Gorge trekking adds distance, heat, and uneven footing. Stack them without a plan and your final activity may begin with tired legs and poor concentration.
Bouldering near the canyon
The best bouldering spots in Gandikota are not defined only by the largest or most photogenic boulder. A useful beginner problem needs a stable landing, manageable height, clear holds, and enough room for a spotter. Inspect the ground before climbing. If you see sharp stones, a sloping landing, or an awkward drop zone, move on.
Use a short movement sequence:
- Brush dust from the hold only if the operator permits it and the surface can tolerate the contact.
- Test the first foothold with partial weight.
- Keep your hips over the landing area.
- Avoid jumping down from height when you can climb down.
- Bend your knees on landing and let your body absorb the impact.
- Stop after a failed move if your fingers or ankles begin to feel unstable.
Do not treat bouldering as a warm-up for unlimited attempts. Repeatedly pulling on small holds while fatigued is a direct route to finger and elbow trouble.
Rappelling beside the gorge
Rappelling looks simple from the ground: lean back, lower yourself, and walk down the wall. The system still depends on correct harness fitting, rope management, brake control, and clear instructions.
At the edge, move only when the instructor tells you to move. Keep your brake hand in the prescribed position. Do not release the rope to take a photograph. Keep your feet planted against the wall and descend in controlled steps rather than jumping. If the rope twists, you lose footing, or you feel the system behave unexpectedly, stop and call up.
Never clip personal gear to a rope system unless the guide instructs you to do so. Keep phones and loose objects secured. A dropped object can injure someone below or disappear into terrain you cannot safely access.
Kayaking on the Pennar River
Kayaking is a separate risk profile from climbing. A calm-looking river does not replace a water briefing. Confirm the route, entry and exit points, required flotation equipment, weather conditions, and the operator’s rescue plan before launching.
Wear the supplied personal flotation device correctly. Keep both hands available for the paddle. Follow the guide’s instructions around current, rocks, and landing points. Do not combine a strenuous climbing session with kayaking if your grip and shoulders are already exhausted. Paddle control deteriorates when your forearms are pumped from a vertical route.
Logistics: reaching the climbing zones near Gandikota Fort
Gandikota is approximately 18 kilometres from Jammalamadugu railway access. It sits around 280 kilometres from Bengaluru, 375 kilometres from Chennai, and 365 kilometres from Hyderabad. Those distances make the destination practical for a longer road trip, but not for a careless same-day dash that leaves you arriving dehydrated and rushing through the activity.
Build the day around the climbing window rather than squeezing the climb between unrelated stops. Reach the adventure facility with enough time for registration, equipment fitting, the safety briefing, and an approach to the wall. The facility is roughly 1 kilometre from the fort premises, so account for that transfer instead of assuming the climbing wall is directly beside every fort viewpoint.
Ask the operator these questions before committing:
1. Is the session guided top-rope climbing, bouldering, rappelling, or a combination?
2. What wall height and angle match a first-time climber?
3. Does the operator provide a helmet, harness, rope system, and any required footwear?
4. How does the guide handle wet rock, excessive heat, or unsafe surface conditions?
5. What communication commands will the climbing team use?
6. How many climbers share one instructor and one route setup?
7. Where do you leave bags, phones, and water during the climb?
8. Can the session be shortened if fatigue or heat affects performance?
9. Which activities can be combined safely on the same day?
10. What happens if the river, gorge, or climbing zone becomes unsuitable?
You do not need a glossy promise of extreme adventure. You need a clear operating plan, a competent briefing, correctly fitted equipment, and a route that matches your actual ability.
What to pack
Keep the kit compact and functional:
- Water sufficient for the travel and activity period.
- Sun protection, including a hat for the approach where appropriate.
- Closed, secure footwear for walking over rough ground.
- Light clothing that does not snag on ropes or hardware.
- A small snack for sustained energy.
- Personal medication and basic first-aid requirements.
- A phone secured away from the rope system.
- A compact bag that can remain outside the active climbing zone.
Do not carry loose bottles, dangling camera straps, or bulky packs onto the wall. Do not assume the canyon will provide shade, reliable water access, or a convenient place to recover after every activity.
Go or no-go: make the decision before the first climb
Choose go when the operator has explained the system, the equipment fits, the route suits your ability, the rock is dry and stable, and you can hear and follow the instructor clearly. You should feel alert, hydrated, and physically capable of controlled movement.
Choose no-go when any of these conditions appear:
- The wall is wet, crumbling, or visibly unstable.
- You cannot confirm who controls the rope and belay system.
- The helmet or harness does not fit correctly.
- The briefing is rushed or communication signals remain unclear.
- You feel dizzy, overheated, sick, or unusually weak.
- The route exposes you to a drop you cannot manage calmly.
- The landing zone is crowded, broken, or poorly controlled.
- The operator pressures you to ignore weather, fatigue, or equipment concerns.
Gandikota rock climbing routes for beginners work best when you treat the experience as structured outdoor training, not a photo opportunity with ropes attached. Start on the guided face. Use your feet. Keep your arms efficient. Protect the landing zone. Communicate before you move. Then add bouldering, rappelling, kayaking, or gorge trekking only when your energy and the conditions support it.
The canyon will still be there after you decide to lower off. That decision is part of climbing.