Gandikota sunrise photography: essential gear and stability tips
The Penna River has cut a 100-meter slot through the Erramala Hills, and at first light the western wall of Gandikota Canyon throws shadow across the gorge floor for roughly 22 minutes after the sun clears the eastern rim.
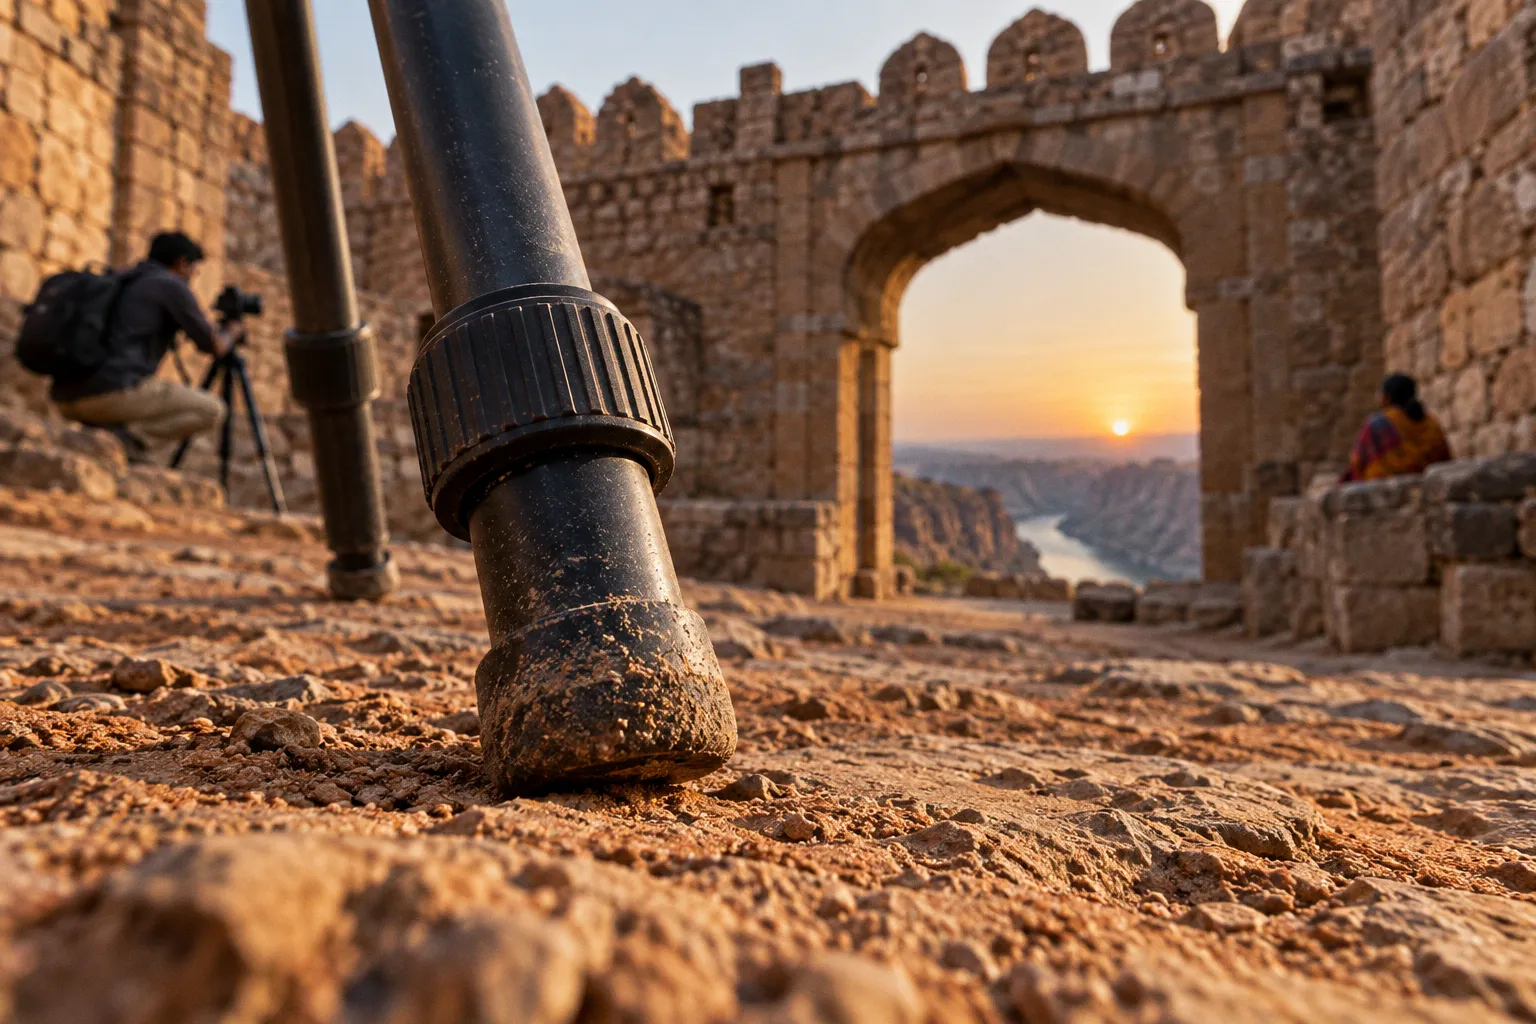
That narrow window is when the red quartzite shifts from flat maroon to burning orange, and it is also when nearly every photographer on the rim is fumbling with a tripod leg that has sunk half an inch into soft sandstone. The difference between a usable shot and a wasted morning almost always traces back to two things: how early you are on the rim, and how solid the base under your tripod is when the wind shifts off the canyon.
This guide covers the gear, the settings, and the field decisions that actually matter when shooting sunrise at Gandikota. No theory about composition. No promises about "magic hour." Just the operational steps and the hardware tolerances that separate a sharp frame from a soft one.
A tripod on unstable sandstone at a 100-meter drop is not a tripod. It is a liability. Anchor the legs before you mount the camera, every time.
Timing and Scouting the 100-Meter Gorge: Why 20 Minutes Matters
Sunrise at Gandikota is not a 9 a.m. problem solved by waking up at 7. It is a pre-dawn operation. Photographers should be on the canyon viewpoint at least 20 minutes before sunrise — 30 minutes is safer — for two reasons that have nothing to do with the photograph itself.
First, the terrain. The cliff-side areas along the Pennar gorge are uneven red sandstone, littered with loose stone and small grit. In low pre-dawn light, depth perception is unreliable. A 20-minute buffer gives you time to walk the rim with a headlamp or red-light torch, identify a flat shelf with three solid contact points for tripod legs, and clear loose debris with a gloved hand. Most rim "spots" are not flat; they are angled slabs that will tip a tripod the moment you lock the ball head.
Second, the light. The Erramala ridge blocks direct sun for several minutes after astronomical sunrise, but the sky transitions through deep blue to magenta to amber while the canyon floor is still in shadow. Setting up 20–30 minutes early lets you take test frames at higher ISO, confirm focus on infinity against a distant ridge, and watch how the shadow line retreats across the gorge. That shadow line is what determines your exposure compensation, and it moves faster than most beginners expect.
Operational window for a Gandikota sunrise shoot:
- T-30 min: On rim, headlamp on, walking the edge to scout a flat shelf.
- T-20 min: Tripod legs extended, camera mounted, test frames at ISO 800 to confirm focus and framing.
- T-10 min: Switch to base ISO (100–200), final framing locked, remote release or 2-second timer armed.
- T-0 to T+20 min: Shooting window as shadow line recedes and warm light hits the western wall.
If you arrive 5 minutes before sunrise, you are already late.
Optimizing Camera Settings for High-Contrast Canyon Light
The dynamic range problem at Gandikota sunrise is real. The eastern sky behind you is bright; the canyon floor below you is still in deep shadow. The red quartzite walls reflect warm light unevenly. Metering off the sky blows out the canyon; metering off the canyon loses the sky color entirely.
The working solution is small apertures paired with low ISO on a stable platform, then bracketing.
Baseline exposure for Gandikota canyon sunrise:
- Aperture: f/8 to f/11. This range balances depth of field across the canyon walls against diffraction on most modern sensors. f/8 is the default; push to f/11 only when foreground rocks in the lower third need extra sharpness.
- ISO: 100 to 200. Base ISO minimizes noise in the shadow regions of the gorge floor. Higher ISO is reserved for pre-sunrise test frames, not final images.
- Shutter speed: Determined by available light. At base ISO and f/8 after the sun clears the rim, expect shutter speeds between 1/30 and 2 seconds depending on cloud cover and the angle of the western wall.
- White balance: Daylight (5500–5600K) or manual Kelvin set between 5400K and 5800K. The red quartzite skews warm, so leave Auto WB off and lock the value.
Bracket every frame. Three-frame brackets at ±1 EV cover the sky-to-shadow range that single exposures cannot. Five-frame brackets at ±2 EV are better when the western wall is already lit and the gorge floor is still 2–3 stops under.
Shoot in RAW. JPG compression loses the shadow detail you need when pulling up the canyon floor in post. A 14-bit RAW file from a current APS-C or full-frame sensor holds roughly 11–13 stops of recoverable dynamic range, which is enough to recover both the magenta sky and the rock detail under the rim.
Mirror lock-up or electronic first-curtain shutter eliminates the internal vibration that softens long exposures on tripod-mounted DSLR and mirrorless bodies. At 1-second exposures on red sandstone, the vibration from a mirror slap is visible at 100% magnification.
Lens Selection and Flare Management for Pennar River Vistas
The Pennar gorge rewards wide angles. The 100-meter drop, the opposing cliff wall, and the river bend below all need to be in frame to communicate scale. A 16–35mm full-frame equivalent or a 10–22mm APS-C equivalent is the working range. Anything longer than 50mm isolates too small a section of the rim to read as "Gandikota."
Lens selection priorities:
1. Wide-angle focal length. 16–24mm full-frame is the sweet spot. Ultra-wide 14mm fisheye-style lenses introduce distortion that flattens the canyon geometry.
2. Front filter threads. A circular polarizer cuts glare off the sandstone and deepens the sky. A graduated ND (soft edge, 2–3 stops) balances the bright sky against the lower two-thirds of the frame.
3. Lens hood mounted at all times. Shooting into direct sunlight at sunrise produces veiling flare. A petal or cylindrical hood shades the front element. Do not remove the hood to "save weight." Flare ruins more Gandikota frames than bad tripods.
4. Minimum focus distance. Check it before committing to a composition. Some wide-angle lenses focus no closer than 0.28 m, which limits foreground rock detail.
Filter stacking order matters. From front to back: hood, circular polarizer, graduated ND, lens cap. The polarizer rotates; the GND does not. Set polarizer angle first, then slot the GND with the dark band aligned to the horizon line of the eastern ridge.
Avoid UV filters as "protection." On a wide-angle lens at f/11, the extra glass adds a measurable loss of contrast against a high-contrast sunrise sky. Use a clear NC filter only if the front element is at risk of direct impact from windblown grit.
Tripod Stability and Safety on Uneven Sandstone Terrain
This is the section that determines whether you walk back to the parking lot with your gear and your ankles intact.
The rim of Gandikota Canyon is not a paved overlook. It is weathered sandstone with loose grit, small stones, and cracks that develop without warning. A tripod leg that sinks 2 cm into soft sandstone during a 2-second exposure will shift the framing by several pixels — enough to lose sharpness at the pixel level and to leave the lower third of the frame misaligned with the bracket sequence.
Stability protocol for the canyon rim:
1. Position legs, not center column. Extend the thicker leg sections first. Keep the center column down. A raised center column raises the center of gravity and amplifies any wind load.
2. Three solid contact points per leg. Press each foot into the rock. If a leg wobbles or rocks, relocate the entire tripod. Do not extend the leg to "find level."
3. Low stance. Spread the legs wide and keep the camera under 1.5 meters off the deck. The lower the rig, the less wind affects it, and the smaller the fall distance if something shifts.
4. Hang weight from the center column hook. A 4–6 kg dry bag filled with rocks or water bottles increases the downward force on each leg and dampens vibration from wind gusts.
5. Stay 2 meters back from any unfortified overhang. Standing directly on an overhanging rock ledge for a "better angle" is a fall hazard at a 100-meter gorge. There is no shot worth that distance.
Wind on the canyon rim is unpredictable. Mornings are usually calm, but thermals begin pulling air up the western wall within 15–20 minutes of sunrise. A 15 km/h gust at the rim feels like 30 km/h because the air funnels through the gorge mouth. Tripods rated for 8 kg of payload handle cameras and lenses fine; they do not handle a 15 km/h crosswind on a raised center column with a 1.5-meter profile.
If the rig is moving in the viewfinder, lower the center column, add weight to the hook, or wait for a gust to pass. Do not chase the frame.
Two meters back from the edge is the line. One meter is a statistic.
Protecting Your Gear from Canyon Dust and Environmental Hazards
The red sandstone at Gandikota sheds fine particulate. Wind picks it up, and the dust settles on front elements, LCD screens, and sensor surfaces. Over a 90-minute shoot, the front of a lens can accumulate a visible film that softens contrast without the photographer noticing until post-production.
Field dust protocol:
- Rocket blower before every lens change. Never change lenses with the sensor exposed in a dusty environment. Hold the body face-down so falling dust is pushed away from the sensor chamber.
- Keep a microfiber cloth in a sealed zip bag, not loose in a pocket. A pocket-stored cloth picks up grit and grinds it into the front coating on the first wipe.
- Use a clear or UV filter only if the lens is being exposed to airborne grit for extended periods. A sacrificial filter is cheaper than a front-element scratch. Swap and clean filters, not the lens itself.
- Seal the camera body and lenses in dry bags or padded cases during the walk-in. Dust enters through every seam during a 15-minute approach from the parking area.
Temperature swings at Gandikota follow the desert profile. Pre-dawn temperatures in the cooler months (November through February) can drop to 12–14°C before climbing past 30°C by mid-morning. Condensation forms on cold glass when the body is brought into a warmer vehicle or tent. Let the camera acclimatize inside a closed bag for 15–20 minutes before opening it in a warm environment, or wipe condensation off the front element with a clean microfiber cloth before it dries into water spots.
Battery capacity drops in cold air. Carry two spare batteries in an inner pocket close to the body. A battery that gives 800 frames at 25°C may cut off at 400 frames at 14°C. Format cards in-camera before each shoot, not on a laptop the night before. In-camera format writes a fresh file structure that reduces the chance of a corrupted frame on a long bracket sequence.
Pre-Shoot Checklist: 30 Minutes Before Sunrise
Run this list on the walk from the parking area to the rim. Do not skip steps because you are in a hurry.
| Step | Action | Verify |
|---|---|---|
| 1 | Headlamp or red-light torch on | Battery fresh, spare in pocket |
| 2 | Tripod legs extended, center column down | Leg locks tight, no wobble |
| 3 | Camera body and lens mounted | Lens hood attached, caps off |
| 4 | Battery at 100%, format card in-camera | Two spare batteries in warm pocket |
| 5 | ISO set to 100–200, aperture f/8–f/11 | Manual mode, RAW selected |
| 6 | Manual focus at infinity, test frame at ISO 800 | Sharp ridge in focus at 100% magnification |
| 7 | Mirror lock-up or EFCS enabled | 2-second timer or remote release armed |
| 8 | Bracket sequence programmed | ±1 EV or ±2 EV, 3 or 5 frames |
| 9 | Polarizer and graduated ND mounted | Polarizer angle set, GND horizon aligned |
| 10 | Weight on center column hook | 4–6 kg bag attached, rig stable |
A tripod on loose sandstone at the edge of a 100-meter gorge is a controlled fall waiting for a mistake. Anchor the legs, lower the rig, weight the column, and step back from the edge. Sharp frames follow solid setups, not the other way around.